

As I'm sure most of you have seen my (not so) little baby girl turned 2 at the beginning of the month and I gave the Ikea play kitchen a little revamp. Here's what I did...


Door knobs for cooker dials - Vinegar Hill

Basket - Olli Ella / Rainbow Puzzle - Le Toy Van / Unicorn and Swan - Ostheimer Wooden Toys / Wooden Mixer - John Lewis / Wooden eggs - Amazon

Hanging bird - Vinegar Hill

Chopping board and Utensils - came in a chopping food set from Melissa & Doug
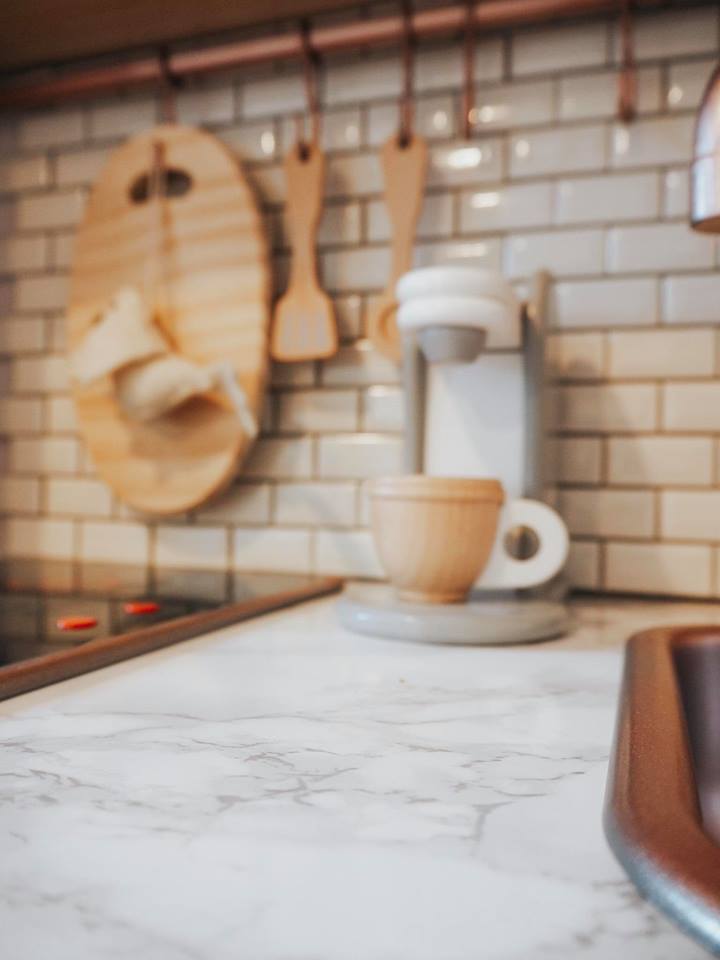
Marble Top - B&Q contact paper / Wooden Coffee Machine - John Lewis

Biscuits - Bigjigs Toys / Chopping veg, Sandwich set,
food group crates - Melissa & Doug / Teapot - Le Toy Van

Rose gold spray paint from Wilko.
First up when you unpack the kitchen there's a plastic bag with all the plastic parts of the kitchen in, this is everything I spray painted rose gold. The sink, handles, hooks, pole, and feet for the bottom. The cooker top comes with a plastic film over the top, use a pen knife to cut it so the grey plastic is totally uncovered, then spray that too. The plastic film was super handy so don't peel it off before spraying!
Next up is the counter top. I bought some marble contact paper from B&Q, its plastic feeling paper that's got a sticky back. I used a bench to place the wooden counter top across then using a credit card (i'd suggest putting a thin cloth over the top of the card so you don't scratch the the marble effect off), then push the paper on with the card to stop bubbles forming under it. Once you're done use a pen knife to cut out the holes for the screws, sink and cooker top. Then fold the paper over the edges. As the counter top as rounded edges you won't get a perfect fit but remember it's a kids toy and it'll get bashed around so it's ok.
Then you're ready to build the kitchen!
I suggest fitting the doors last, I didn't and it made the next step slightly harder. I bought 3 matching door knobs to create the cooker dials. So before putting the doors on, drill 3 holes on the front below the cooker top and put the knobs on there. I left them loose so Kovah could turn them.
Finally, the tricky bit. I got some self adhesive tiles from B&Q that came in sheets. I used 3 and had to cut some in half. These were stuck onto a thin wooden board then glued into the gap of the kitchen to create a tiled backsplash effect. Shop tiles here!
Once it was all done, it was just a case of filling it with food and accessories. Chopping food is a huge hit and anything tea set related. I've listed the items and brands of the add ons underneath the photos to help you out.
So thats how I hacked the Ikea kitchen and there are some amazing inspiration photos on Pinterest if you search 'ikea play kitchen hack'. It was honestly super fun but you guys know how much I love making things Let me know if you give it a go.
No comments
Post a Comment